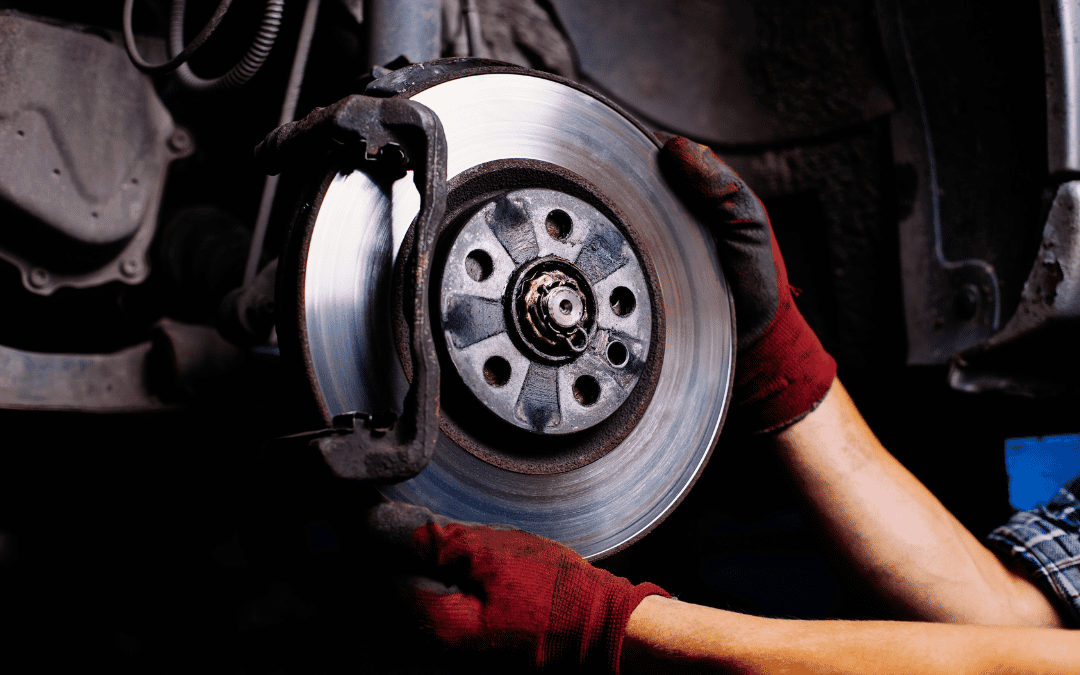
Recognizing the Root Causes of Brake Noise
Brake squealing is one of the most common complaints drivers bring to any auto repair shop, and understanding its root causes is the first step toward effective troubleshooting. The high-pitched sound you hear when applying your brakes typically stems from several distinct sources. The most common culprit is the wear indicator—a small metal tab designed to contact the rotor when your brake pads have worn down to a critical level. This intentional design creates that unmistakable metal-on-metal squeal as an early warning system, alerting you before complete brake failure occurs.
Beyond wear indicators, brake dust accumulation between the pad and rotor can generate friction-based squealing, particularly after extended periods of highway driving. Moisture exposure, especially during San Antonio’s humid summer months and occasional heavy downpours, can cause temporary squealing that disappears after a few brake applications as the moisture burns off. The city’s intense heat—regularly exceeding 95 degrees from June through September—can also cause brake components to expand slightly, changing the contact dynamics between pads and rotors.
Misalignment or improper installation of brake hardware represents another frequent cause. When caliper slides seize or anti-rattle clips become dislodged, the brake pad can vibrate against the rotor at specific frequencies, producing that characteristic squeal during stop-and-go traffic common throughout the downtown corridor and I-10 interchanges. Glazed brake pads—smooth, hardened surfaces caused by excessive heat—lose their proper friction coefficient and can squeal continuously, regardless of application pressure. Understanding which scenario matches your symptoms will guide your diagnostic approach and help determine whether immediate brake repair service is necessary.
Conducting Your First Visual Assessment
Beginning your brake diagnosis with a thorough visual inspection allows you to identify obvious problems without specialized tools. Park your vehicle on level ground in a well-lit area—daylight provides far superior visibility compared to dim garage lighting, making it easier to spot wear patterns, cracks, or contamination. If your wheels have open spoke designs, you may be able to see the outer brake pad and rotor without removing the wheel. Look for the brake pad thickness; if less than one-quarter inch of friction material remains, replacement is overdue and squealing is likely the wear indicator doing its job.
For a more complete assessment, remove each wheel using your vehicle’s lug wrench and jack. With the wheel off, inspect both the inner and outer brake pads for uneven wear patterns. Pads should wear relatively evenly across their surface; if one edge is significantly thinner, this indicates caliper misalignment or seized slide pins. Examine the rotor surface for scoring, grooves, or rust buildup. Light surface rust is normal after rain or overnight moisture, but deep grooves or significant pitting suggest the rotor needs resurfacing or replacement.
Check the brake hardware—the small metal clips and shims that prevent pad vibration. Missing, damaged, or corroded hardware frequently causes squealing even when pads and rotors are in acceptable condition. Gently press the brake pads to confirm they move smoothly within the caliper bracket; any binding or resistance indicates seized components. Listen carefully while a helper slowly applies the brake pedal; you may hear the squeal originate from a specific wheel, helping narrow your diagnostic focus. If you observe brake fluid leaks, severely worn pads (less than one-eighth inch), or deeply grooved rotors, skip further DIY steps and schedule a brake repair service immediately, as these conditions compromise your stopping ability and safety.
Analyzing Brake Noise Patterns Through Controlled Testing
A systematic test drive provides critical diagnostic information by revealing when, where, and under what conditions the squealing occurs. Choose a safe route with minimal traffic that includes varied driving conditions: gentle stops, firm braking, low-speed maneuvering, and highway-speed deceleration. Begin your test with cold brakes—before the vehicle has been driven that day—since some brake squealing only occurs before components reach operating temperature. Document whether the noise appears immediately or only after several brake applications.
Pay close attention to the specific moment the squeal begins. Does it occur the instant you touch the brake pedal, suggesting constant rotor contact? Does it appear only during moderate to heavy braking, indicating wear indicator contact under pressure? Or does the sound emerge during the final moments of stopping, when brake pads shift position as the vehicle settles? Note whether the squeal changes pitch or volume as you increase brake pressure. A squeal that intensifies with harder braking typically indicates advanced pad wear or rotor surface issues, while noise that remains constant regardless of pressure often points to hardware problems or dust accumulation.
San Antonio’s varied terrain—from the hilly neighborhoods near the Medical Center to the flat expanses along Loop 1604—provides natural testing conditions. The frequent stops at traffic lights along major corridors like Bandera Road and the repeated braking in heavy I-10 traffic place continuous demands on your brake system, making pattern recognition easier. Test whether turning affects the noise; squealing that worsens during left or right turns may indicate uneven pad wear or caliper mounting issues on the outer wheels. Record your observations in detail—specific conditions help any auto inspection services technician diagnose the problem more efficiently if professional evaluation becomes necessary, potentially saving diagnostic time and reducing your overall repair costs.
Evaluating Rotor Condition and Measuring Critical Specifications
Moving beyond visual inspection requires measuring specific brake component dimensions to determine whether parts remain within manufacturer specifications. Brake pad thickness represents your most critical measurement. Using a brake pad gauge or precision ruler, measure the friction material remaining on each pad, excluding the metal backing plate. Most manufacturers specify a minimum thickness between 2mm and 3mm; anything below this threshold requires immediate replacement. Uneven wear between the inner and outer pads on the same wheel—a difference greater than 2mm—indicates caliper problems that will cause continued squealing even after pad replacement.
Rotor assessment determines whether resurfacing or replacement is necessary. Measure rotor thickness at multiple points around its circumference using a micrometer, comparing your readings against the minimum thickness specification stamped on the rotor hub or listed in your vehicle’s service manual. Rotors worn beyond this minimum cannot be safely resurfaced and must be replaced. Even if thickness remains acceptable, check for lateral runout—side-to-side wobble as the rotor rotates. Mount a dial indicator against the rotor face and slowly rotate the wheel by hand; runout exceeding 0.002 inches causes pulsation and can contribute to squealing as the pad intermittently contacts the high spots.
Examine the rotor surface finish carefully. A properly functioning rotor displays a smooth, uniform, slightly matte surface. Shiny, glazed areas indicate overheating, which hardens the rotor surface and reduces friction, often producing squealing. Deep grooves or scoring—channels you can catch with your fingernail—mean the rotor has been operating with completely worn pads, allowing metal-to-metal contact. This condition requires rotor replacement rather than resurfacing, as the structural integrity has been compromised. Check the caliper slide pins by removing them and assessing their movement; they should slide freely with only light pressure. Seized or sticky slides prevent even pad wear and cause continuous contact squealing. If your measurements reveal parts outside specifications or you lack the tools for precise measurement, professional brake repair service ensures accurate assessment and proper repairs using calibrated equipment and manufacturer-approved parts.
Knowing When DIY Diagnosis Requires Professional Expertise
While basic brake inspection helps you understand your vehicle’s condition, certain symptoms and findings demand professional attention for both safety and proper repair. If your diagnosis reveals brake pad thickness below one-eighth inch, deeply scored rotors, brake fluid leaks, or any component damage, discontinue DIY efforts and schedule immediate service. These conditions can rapidly progress to complete brake failure, especially under the demanding stop-and-go conditions common during San Antonio rush hours or when navigating the heavy traffic near major shopping districts and business centers.
Professional evaluation becomes necessary when you lack the specialized tools required for accurate measurement—micrometers, dial indicators, and torque wrenches—or when your inspection reveals problems beyond simple pad replacement. Anti-lock braking system (ABS) sensor issues, electronic brake distribution problems, or complex hydraulic concerns require diagnostic equipment that most home mechanics do not possess. If squealing persists after you have replaced pads and resurfaced rotors, the underlying cause likely involves caliper malfunction, master cylinder issues, or brake fluid contamination that only trained technicians can properly diagnose and repair.
Consider professional brake repair service when you feel uncertain about any aspect of brake work. Unlike many automotive repairs, brakes directly determine your ability to avoid collisions and protect yourself, your passengers, and other drivers. A qualified auto repair shop provides not only proper diagnosis but also warranty-backed repairs, ensuring that parts and labor meet safety standards. Technicians experienced in brake systems can identify subtle problems—slightly bent backing plates, contaminated friction material, or worn caliper bores—that even careful DIY inspection might miss. If you are experiencing persistent brake squealing or identified concerning wear patterns during your inspection, we recommend scheduling a thorough brake inspection. Our technicians can provide detailed assessment, explain your options clearly, and perform any necessary repairs using quality parts designed for your specific vehicle, restoring quiet, confident stopping performance.